
VMware ESXi 6.7 has just been released and in this blog post I’m going to show you how to Automatically Install VMware ESXi 6.7 through PXE boot. There’s also a small change in boot.cfg compared to prior versions which needs to be address for a successful deployment (the kernel).

Download the VMware ESXi 6.7 ISO image and copy the content to C:\TFTP\TFTP\ESX. Open the file boot.cfg and change the paths or just copy/paste the code:
|
1 2 3 4 5 6 7 8 |
bootstate=0 title=Loading ESXi installer timeout=5 kernel=/esx/b.b00 kernelopt=runweasel modules=/esx/jumpstrt.gz --- /esx/useropts.gz --- /esx/features.gz --- /esx/k.b00 --- /esx/chardevs.b00 --- /esx/user.b00 --- /esx/procfs.b00 --- /esx/uc_intel.b00 --- /esx/uc_amd.b00 --- /esx/vmx.v00 --- /esx/vim.v00 --- /esx/sb.v00 --- /esx/s.v00 --- /esx/ata_liba.v00 --- /esx/ata_pata.v00 --- /esx/ata_pata.v01 --- /esx/ata_pata.v02 --- /esx/ata_pata.v03 --- /esx/ata_pata.v04 --- /esx/ata_pata.v05 --- /esx/ata_pata.v06 --- /esx/ata_pata.v07 --- /esx/block_cc.v00 --- /esx/bnxtnet.v00 --- /esx/brcmfcoe.v00 --- /esx/char_ran.v00 --- /esx/ehci_ehc.v00 --- /esx/elxiscsi.v00 --- /esx/elxnet.v00 --- /esx/hid_hid.v00 --- /esx/i40en.v00 --- /esx/iavmd.v00 --- /esx/igbn.v00 --- /esx/ima_qla4.v00 --- /esx/ipmi_ipm.v00 --- /esx/ipmi_ipm.v01 --- /esx/ipmi_ipm.v02 --- /esx/iser.v00 --- /esx/ixgben.v00 --- /esx/lpfc.v00 --- /esx/lpnic.v00 --- /esx/lsi_mr3.v00 --- /esx/lsi_msgp.v00 --- /esx/lsi_msgp.v01 --- /esx/lsi_msgp.v02 --- /esx/misc_cni.v00 --- /esx/misc_dri.v00 --- /esx/mtip32xx.v00 --- /esx/ne1000.v00 --- /esx/nenic.v00 --- /esx/net_bnx2.v00 --- /esx/net_bnx2.v01 --- /esx/net_cdc_.v00 --- /esx/net_cnic.v00 --- /esx/net_e100.v00 --- /esx/net_e100.v01 --- /esx/net_enic.v00 --- /esx/net_fcoe.v00 --- /esx/net_forc.v00 --- /esx/net_igb.v00 --- /esx/net_ixgb.v00 --- /esx/net_libf.v00 --- /esx/net_mlx4.v00 --- /esx/net_mlx4.v01 --- /esx/net_nx_n.v00 --- /esx/net_tg3.v00 --- /esx/net_usbn.v00 --- /esx/net_vmxn.v00 --- /esx/nhpsa.v00 --- /esx/nmlx4_co.v00 --- /esx/nmlx4_en.v00 --- /esx/nmlx4_rd.v00 --- /esx/nmlx5_co.v00 --- /esx/nmlx5_rd.v00 --- /esx/ntg3.v00 --- /esx/nvme.v00 --- /esx/nvmxnet3.v00 --- /esx/nvmxnet3.v01 --- /esx/ohci_usb.v00 --- /esx/pvscsi.v00 --- /esx/qcnic.v00 --- /esx/qedentv.v00 --- /esx/qfle3.v00 --- /esx/qfle3f.v00 --- /esx/qfle3i.v00 --- /esx/qflge.v00 --- /esx/sata_ahc.v00 --- /esx/sata_ata.v00 --- /esx/sata_sat.v00 --- /esx/sata_sat.v01 --- /esx/sata_sat.v02 --- /esx/sata_sat.v03 --- /esx/sata_sat.v04 --- /esx/scsi_aac.v00 --- /esx/scsi_adp.v00 --- /esx/scsi_aic.v00 --- /esx/scsi_bnx.v00 --- /esx/scsi_bnx.v01 --- /esx/scsi_fni.v00 --- /esx/scsi_hps.v00 --- /esx/scsi_ips.v00 --- /esx/scsi_isc.v00 --- /esx/scsi_lib.v00 --- /esx/scsi_meg.v00 --- /esx/scsi_meg.v01 --- /esx/scsi_meg.v02 --- /esx/scsi_mpt.v00 --- /esx/scsi_mpt.v01 --- /esx/scsi_mpt.v02 --- /esx/scsi_qla.v00 --- /esx/shim_isc.v00 --- /esx/shim_isc.v01 --- /esx/shim_lib.v00 --- /esx/shim_lib.v01 --- /esx/shim_lib.v02 --- /esx/shim_lib.v03 --- /esx/shim_lib.v04 --- /esx/shim_lib.v05 --- /esx/shim_vmk.v00 --- /esx/shim_vmk.v01 --- /esx/shim_vmk.v02 --- /esx/smartpqi.v00 --- /esx/uhci_usb.v00 --- /esx/usb_stor.v00 --- /esx/usbcore_.v00 --- /esx/vmkata.v00 --- /esx/vmkfcoe.v00 --- /esx/vmkplexe.v00 --- /esx/vmkusb.v00 --- /esx/vmw_ahci.v00 --- /esx/xhci_xhc.v00 --- /esx/elx_esx_.v00 --- /esx/btldr.t00 --- /esx/weaselin.t00 --- /esx/esx_dvfi.v00 --- /esx/esx_ui.v00 --- /esx/lsu_hp_h.v00 --- /esx/lsu_lsi_.v00 --- /esx/lsu_lsi_.v01 --- /esx/lsu_lsi_.v02 --- /esx/lsu_lsi_.v03 --- /esx/native_m.v00 --- /esx/qlnative.v00 --- /esx/rste.v00 --- /esx/vmware_e.v00 --- /esx/vsan.v00 --- /esx/vsanheal.v00 --- /esx/vsanmgmt.v00 --- /esx/tools.t00 --- /esx/xorg.v00 --- /esx/imgdb.tgz --- /esx/imgpayld.tgz build= updated=0 |
Create the folder C:\TFTP\TFTP\pxelinux.cfg and a file inside it named 01-THE-MAC-ADRESS-OF-HYPERVISOR like this 01-00-1F-C6-9B-D9-4C. Copy/paste the code:
|
1 2 3 4 5 6 7 8 9 10 11 12 13 14 15 16 17 18 19 20 |
default menu.c32 prompt 0 timeout 180 ONTIMEOUT bootlocal menu title Automation Framework Master Class label bootlocal menu label Boot Local OS localboot 0 label xenserver menu label Install Citrix XenServer 7.4 kernel mboot.c32 append xenserver/xen.gz dom0_max_vcpus=2 dom0_mem=1024M,max:1024M com1=115200,8n1 console=com1,vga --- xenserver/vmlinuz xencons=hvc console=hvc0 console=tty0 answerfile=ftp://192.168.2.202/Config/NUC06.xml install --- xenserver/install.img label esx menu label Install VMware ESXi 6.7 kernel /esx/mboot.c32 append -c /esx/boot.cfg ks=ftp://192.168.2.202/KS/nuc06.cfg |
As you can see below we have a boot menu that automatically boots to the Local OS or we can select to install either Citrix XenServer or VMware ESXi.

Create the folder C:\FTP\KS and a file inside it named nuc06.cfg and copy/paste the code:
|
1 2 3 4 5 6 7 8 9 10 11 12 13 14 15 16 17 18 19 20 21 22 23 24 25 26 27 28 29 30 31 32 33 34 35 36 37 38 39 40 41 42 43 44 45 46 47 48 49 50 51 52 53 54 55 56 57 58 59 60 61 62 63 64 65 66 67 68 69 70 71 72 |
# Sample KS File accepteula install --firstdisk --overwritevmfs rootpw P@ssw0rd reboot vmserialnum --esx=PUT IN YOUR LICENSE KEY #network configuration network --bootproto=dhcp --device=vmnic0 # run the following command only on the firstboot %firstboot --interpreter=busybox # enable & start remote ESXi Shell (SSH) vim-cmd hostsvc/enable_ssh vim-cmd hostsvc/start_ssh # enable & start ESXi Shell (TSM) vim-cmd hostsvc/enable_esx_shell vim-cmd hostsvc/start_esx_shell # enable High Performance # http://www.virtuallyghetto.com/2012/08/configuring-esxi-power-management.html esxcli system settings advanced set --option=/Power/CpuPolicy --string-value="High Performance" # supress ESXi Shell shell warning - Thanks to Duncan (http://www.yellow-bricks.com/2011/07/21/esxi-5-suppressing-the-localremote-shell-warning/) esxcli system settings advanced set -o /UserVars/SuppressShellWarning -i 1 #Disable ipv6 esxcli network ip set --ipv6-enabled=0 # NTP Configuration (thanks to http://www.virtuallyghetto.com) cat > /etc/ntp.conf << __NTP_CONFIG__ restrict default kod nomodify notrap noquerynopeer restrict 127.0.0.1 server 129.6.15.28 server 129.6.15.29 server 129.6.15.30 __NTP_CONFIG__ /sbin/chkconfig ntpd on # rename local datastore to something more meaningful vim-cmd hostsvc/datastore/rename datastore1 "SSD" # Copy Stuff mkdir /vmfs/volumes/SSD/ISO mkdir /vmfs/volumes/SSD/OVA wget http://192.168.2.202/ISO/GOOPHY_VMW.iso -O /vmfs/volumes/SSD/ISO/GOOPHY_VMW.iso wget http://192.168.2.202/ISO/iPXE.iso -O /vmfs/volumes/SSD/ISO/iPXE.iso wget http://192.168.2.202/ISO/MDTBuildLab_x64.iso -O /vmfs/volumes/SSD/ISO/MDTBuildLab_x64.iso wget http://192.168.2.202/ISO/MDTProduction_x64.iso -O /vmfs/volumes/SSD/ISO/MDTProduction_x64.iso wget http://192.168.2.202/ISO/14393.0.160715-1616.RS1_RELEASE_SERVER_EVAL_X64FRE_EN-US.ISO -O /vmfs/volumes/SSD/ISO/14393.0.160715-1616.RS1_RELEASE_SERVER_EVAL_X64FRE_EN-US.ISO # Installing OVF Tools wget http://192.168.2.202/ISO/ovf.tar.gz -O /vmfs/volumes/SSD/ovf.tar.gz tar -xzvf /vmfs/volumes/SSD/ovf.tar.gz -C /vmfs/volumes/SSD/ # Create Custom vSwitch esxcli network vswitch standard portgroup remove -p 'VM Network' -v vSwitch0 esxcli network vswitch standard add --vswitch-name "vSwitch1" esxcli network vswitch standard portgroup add -p 'Internal' -v vSwitch1 esxcli network vswitch standard portgroup add -p 'External' -v vSwitch0 # Importing Vyatta Gateway wget http://192.168.2.202/ISO/vyos-1.1.7-amd64-signed.ova -O vmfs/volumes/SSD/OVA/vyos-1.1.7-amd64-signed.ova /vmfs/volumes/SSD/ovf/tools/ovftool --datastore=SSD --noSSLVerify --network=External --name="GW-01" /vmfs/volumes/SSD/OVA/vyos-1.1.7-amd64-signed.ova vi://root:P@[email protected] # Restart a last time reboot |
My kickstarter file above does a lot of stuff, but it’s a great example to get you started with Hypervisor automation.
Finally you’ll need a TFTP/FTP program, I’m using Serva Community.
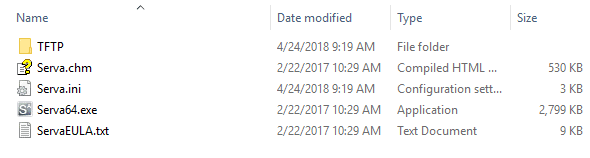
Make sure to use the GUI or edit the Serva.ini file to specify the TFTP and FTP folder location.

If you want to learn how to deploy hundreds of Hypervisor fully automated and other cool automation stuff make sure to check out my 3 day Automation Framework Master Class.
Ah wow not only is this is useful post to begin with but the example kickstart file with all the extra stuff in it is super duper useful, thanks.
The information on this page is very helpful and useful.
Any idea what would cause the kickstart file to not execute an ovftool command that works perfectly on command line?
i.e. the ovftool is correctly installed, and the command I pass to it in the kickstart file does not work and after the installation is complete, the VM has not been installed. I can then ssh to the box and run the exact same line and the VM is registered correctly.
You need to make sure that the OVFTool are present and the command set probably.
https://communities.vmware.com/thread/610114
I have a kickstart config file created and it works great…however I cannot for the life of me get the NTP Configuration to work at all. DO you have any secret or advice as the GUI shows no configuration and the service is off.
Strange, it should just work. can you run the cmds manually through Putty?
# NTP Configuration (thanks to http://www.virtuallyghetto.com) cat > /etc/ntp.conf << __NTP_CONFIG__ restrict default kod nomodify notrap noquerynopeer restrict 127.0.0.1 server 129.6.15.28 server 129.6.15.29 server 129.6.15.30 __NTP_CONFIG__ /sbin/chkconfig ntpd on
Tried running them manually. I get no error and the service does not start. I issues the NTPD start command and still nothing. I can manually edit in the UI and no issues…just not via CLI.
How do you get the ovf.tar.gz for ovftool version 4.3?
I no longer remember, just that it was a PITA. Please try using this new version : https://github.com/haavarstein/New-HypervisorPXESetup