
Installing VMware vCenter Server Appliance (VCSA) version 5.x was very clumsy to say at least. This improved with version VCSA 6.x when the installation became web based, but still…
Now with the release of the ESXi Embedded Host Client 4 we finally got OVA/OVF support. So let me show you how to get the VCSA running in under 5 minutes!

VMware vCenter Server Appliance (VCSA) Installation
1. SSH into your ESXi host to install the Embedded Host Client (WIth and after version 6.0.0-3634788 it’s installed by default).
|
1 |
esxcli software vib install -v http://download3.vmware.com/software/vmw-tools/esxui/esxui_signed.vib |
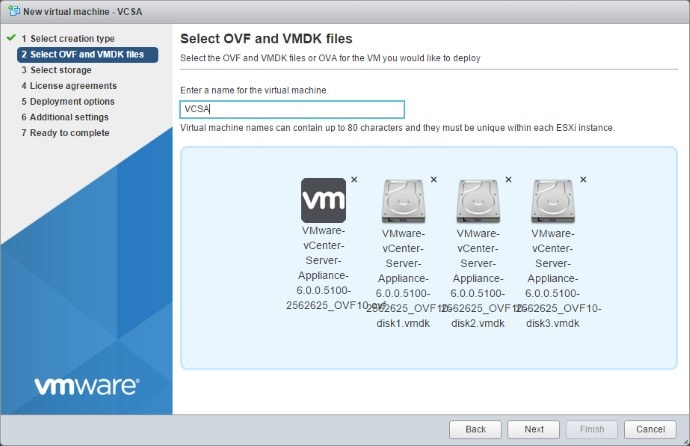
2. Locate the vmware-vcsa file in the VCSA 6.x ISO image.

3. Copy the file to a temp folder and rename it to vmware-vcsa.ova
4. Extract the content of vmware-vcsa.ova with 7Zip.
5. Point your browser to https://esxihost/ui
6. Select the OVF and VMDK files and drag & drop.


Directory Domain Name needs to be different from your domain name, just use vsphere.local.


Please beware of this article: VMware vCenter Server Appliance 5.5 and 6.0 root account locked out after password expiration (2069041).
Login to vCenter and select the Admin tab. I’ve just change from 90 to 90.000 days.

When using EVALExperience, these are the various product names of the licenses:
VCSA License => VMware vCenter Server Standalone for vSphere 6
ESXi License => VMware vSphere with Operations Management Enterprise Plus
PS: If you have limited memory resources you can change the Appliance from 8 GB to 4608 MB and run the following command via Putty to turn off VMware Content Library.
To accomplish this you need to enable SSH and Bash Shell.

Then connect through Putty to your VCSA and run the following command:
|
1 2 |
shell chkconfig vmware-vdcs off |
Finally restart your VCSA.

That’s it, never been easier!